Understanding the Admin Panel: Licensing and Module Configurations

As an administrator, you can control how users access and interact with their Modern Requirements4DevOps projects by applying admin settings. Our admin settings are available at Azure DevOps(ADO) / Organization settings / Modern Requirements4DevOps. Once you have configured the settings, the configurations will then apply to all projects under the Account/Collection.
It should be noted that for on-premises deployment of Azure DevOps (or TFS) Modern Requirements4DevOps setting is at the Collection level. In this document we will refer to Collection but for Azure DevOps on the cloud deployment it means Account.
In this blog, we cover the Licensing, General, Review, and Baseline Tabs.
Before you begin
The admin panel can be accessed by going to the Account/Admin settings – Modern Requirements4DevOps Extension.
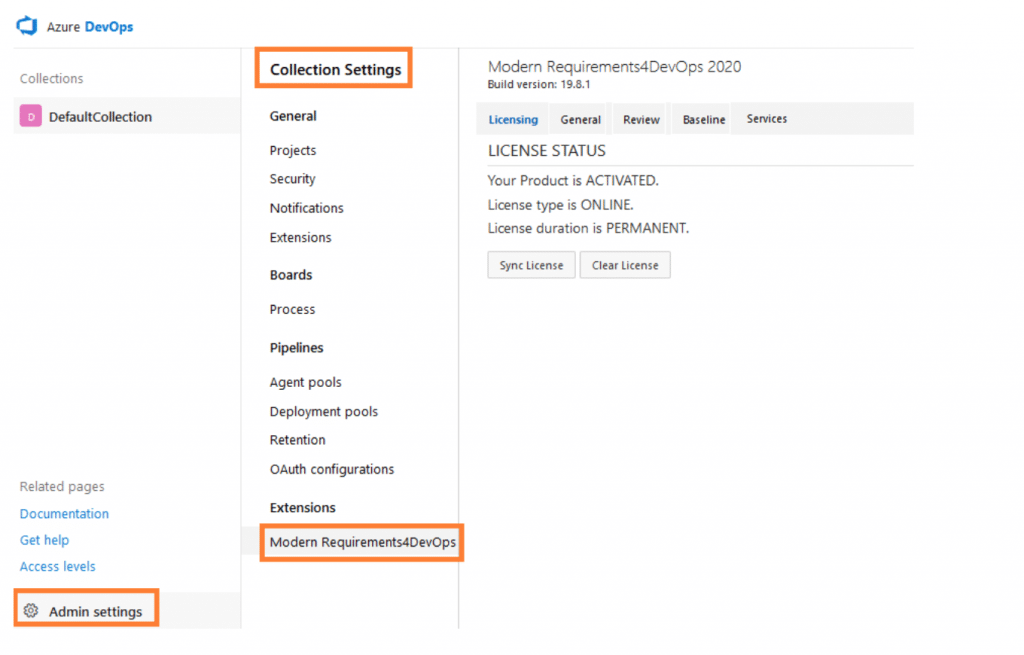
Users need to have Account admin rights to get to the General, Review, and Baseline Tabs. The Account administrators could visit the Security tab under Account Settings to provide admin rights to additional team members.

Licensing Settings
The Licensing section is used to activate the product using a valid key or check the license status. In Modern Requirements, we have three types of licenses.
Trial licenses allow using all the features of MR4DevOps for 30 days with no strings attached and costs.
A User-based License is bound to one authorized user and cannot be used for any other users.
A Floating License can be shared among multiple users over time.
General Settings
User credential & Project Repository Name
This section allows you to synchronize your MR data to source control of ADO Server. Normally, it is very helpful when users do not have permission to write in the ADO Repository. In that case, you can add the credentials to access the ADO repository.
Be default, your MR project is saved in its default ADO repository. Or you can configure the repository name by using the Project Repository Name section.
Configure e-mail settings
When you invite project stakeholders to review your requirements by using the Review module, the system could send a notification to the reviewer/approver on your behalf. In order to allow the system to do that, you will need to provide the outgoing server information and the account information of your email. You could check with your email service provider to get the outgoing mail server information and also make sure it requires SSL enabling or not.
The e-mail settings here also apply to the Simulation feedback in the Simulation module.
Auto Save Layout Settings
For the Auto Save option, normally we have it checked. It means that as soon as users either create new links from Link panel, update any existing link or delete it, all the layout changes made to Diagram, Simulation or Use Cases will be saved automatically.
Section Configuration
When compare two revisions of a Work Item, you could decide to include the attachments or links in the Compare pop-up or not.
Any change you make to the attachments of a Work Item will be considered as a revision. If you have ‘Show Attachments’ checked, then attachment comparisons will show up in the compare pop-up.
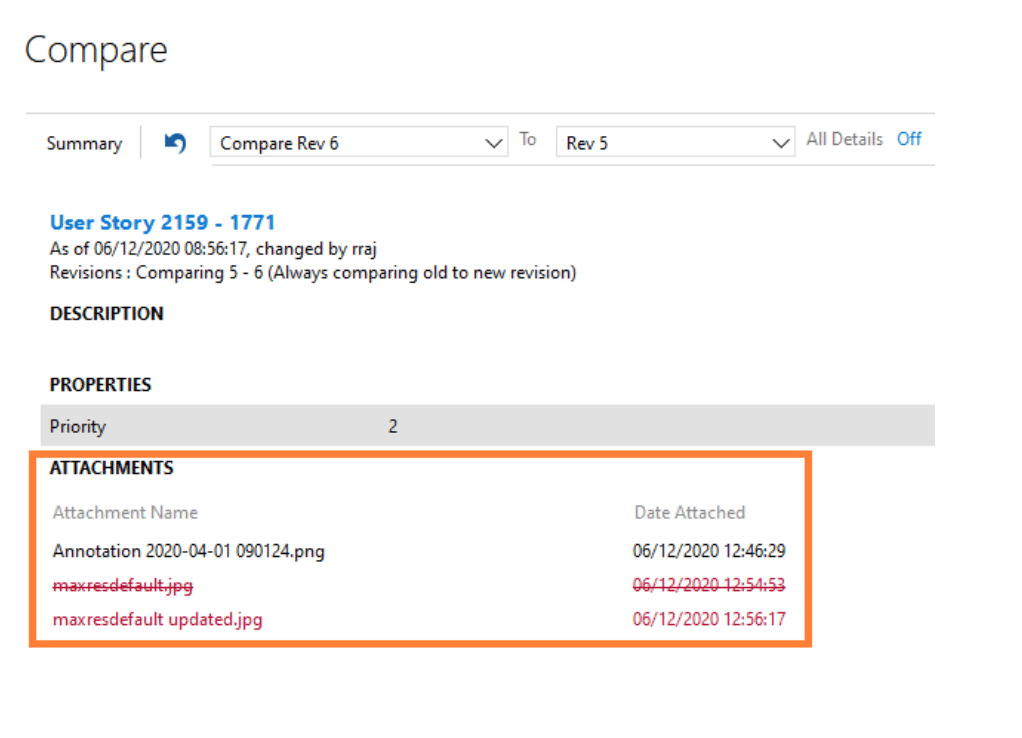
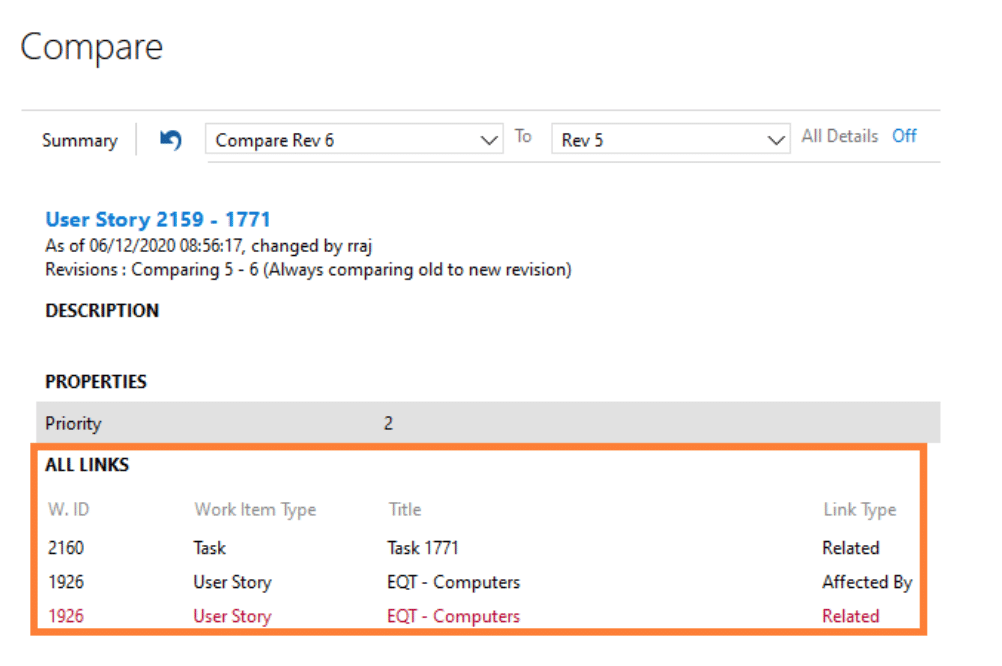
When you have ‘Show Links’ checked, any change to the Work Item links will be included in the Compare pop-up.
Consider Work Item links for comparison
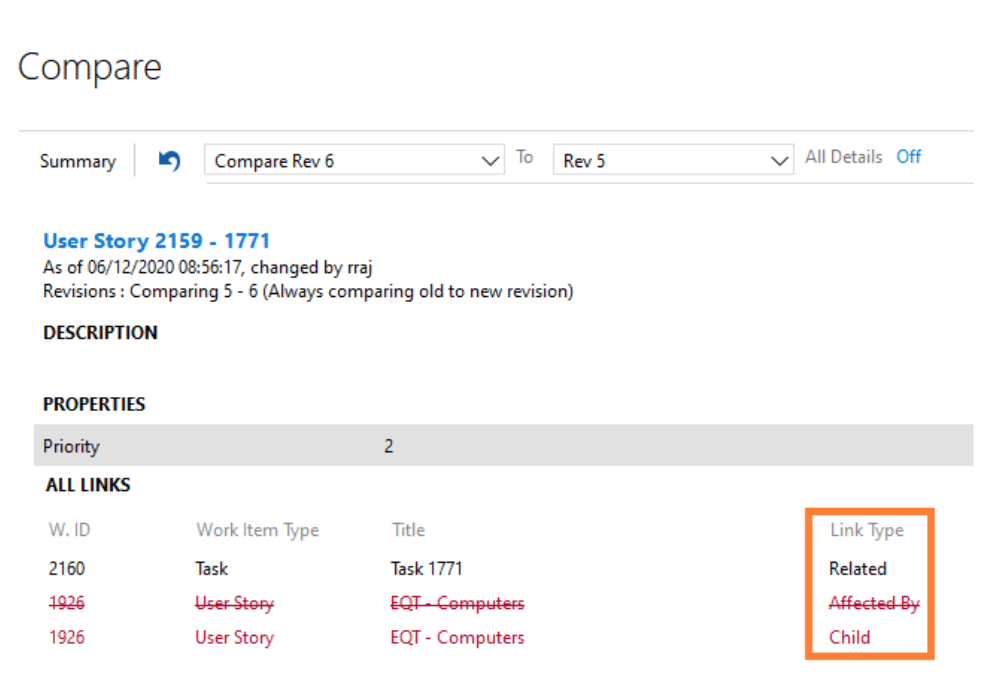
The link types you select in the ‘Consider Work Item links for comparison’ section will appear in the links comparison part of the Work Item Compare pop-up.
Also, these link types configured here will be considered for baseline comparison in the Baseline module.
Work Item Configuration
When you click on a Work Item title in the Baseline or Review module,
If you have the ‘Open the compare popup on clicking the Work Item title’ checked: the Work Item Compare pop-up will appear.
If you have it unchecked: the Work Item Standard Editor pop-up will show up.
Work Item display fields
Work Items field(s) in the Compare pop-up is configurable too!
Work Item fields you added in the ‘Work Item display fields’ will show up when you invoke the Compare pop-up from anywhere except from the baseline Compare tab in the Baseline module.
Work Item display fields for Comparison
Work Item fields you added in the ‘Work Item display fields for Comparison’ will show up when you invoke the Compare pop-up from the baseline Compare tab in the Baseline module.
Also, these fields will be considered for baseline comparison in the Baseline module.

Review Settings
These settings change which rules users are able to select when setting up a review, how those rules are applied, which actions can be taken during a review and more.
Data Migration
Users can migrate all legacy reviews which were created in MR prior to MR4DevOps 2019 Update 2 to new implementations of the Review module.
Auto-Generation of Review Audit Reports
Users can generate Audit Reports of all reviews in a project or even all projects in a collection at once. You can specify a time period during which those reviews were created. In case the dates are not provided, then Audit Reports of all the reviews present in the selected project(s) will be generated.
All downloaded Audit Reports could be found at: C:\Users\Public\Documents\Review Management.
Audit Reports Format
In this section, users can select a format in which they want to generate the audit reports, either Word or PDF format.
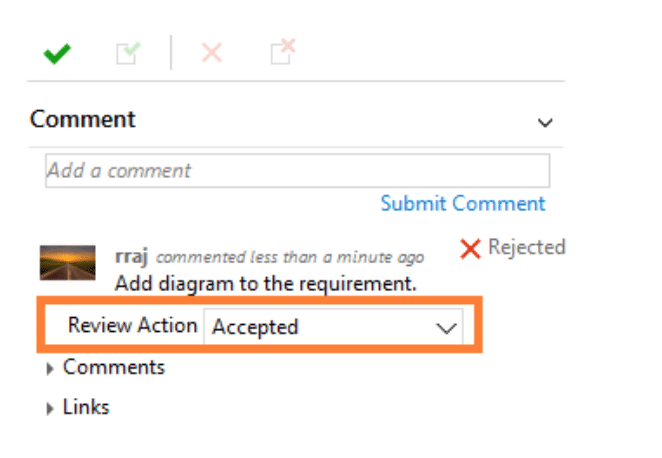
Review Response Actions
The Review Actions can be configured. You can add extra actions to label your reaction to the reviewer/approver’s comments.
Due Date Configurations
Every time you initiate a review request, a Due Date could be assigned to indicate the deadline when the reviewer/approver is expected to complete the review. In this section, you can change the default Due Date or configure user’s rights to change or clear the Due Date settings.
Rules Configurations Review Pop Up
In this section, you select what configuration options you want to keep in the review initiation pop-up and their default values.
The section covers these functionalities.
‘Approve as package (not individually)’ means the approver can only accept or reject the entire set of Work Items instead of doing so one by one.
‘Ask user for password on approval’ is the e-signature functionality. Approvers must now use ‘Personal
Access Token’ when responding to an approval request.
When the option ‘Auto-close review’ is unchecked, the Review will not be closed automatically on due date expiry or all responses have been completed.
The ‘Show States option’ allows review initiators to turn on/off the Work Item state related settings. There are three of them, ‘Pre state’, ‘Post state’, and ‘Change State’.
The ‘Pre state’ allows review initiators to filter a subset of Work Items, based on the Pre-state selected here.
When the ‘Change state’ condition has been met, all Work Items will change to the state defined in the ‘Post state’ option.
Review non-participant Rights
There are different roles for ensuring a project’s success. As a project administrator, you might want to grant different review access to different stakeholders. Nonparticipants, which means they are neither approvers nor reviewers, can now review requirements in a read-only mode. This can be configured here in the ‘Review non-participant Rights’ section.
Send E-mails
In a review event, the system can automatically send out notifications to stakeholders when certain situations occur. Users can configure which events would trigger emails to be sent, by checking or unchecking relevant checkboxes in this section.
Send Reminder
In this section, users can configure when the system should send out notifications to the reviewers/approvers to remind them to respond to the review request within due time. For example, if you choose 3 days, it means a reminder email will be sent out 3 days before the due date if response still not received.
Review Post State Rule
When the ‘Post state’ you have set when initiate a review request can not be automatically achieved for any reason, the review initiator would be notified automatically via email. You may want to send out automatic notifications to additional stakeholders and you can add their email address in this section.
Baseline Settings
An important functionality of the Baseline module is requirements reuse. In Baseline, users can copy Work Items from a saved baseline to the same project or to another project. Settings when copy requirements by using the Baseline module is configurable. Users can assign field values of copied Work Items and specify a link type between the source Work Items and copied Work Items.
Fields Configuration for Copy baseline
Sometimes, we might not want to copy every field value from the source Work Items to the copied Work Items. In this section, you can specify the Work Item field values, which will become the default initial field values in the copied Work Items.
Link type for Copy baseline
Building a link between source and copied Work Items enables users to keep track of the origins of copied requirements. In this section, users can choose a default link type which will become the link relationship between the source Work Items and the copied Work Items.

