Smart Editor
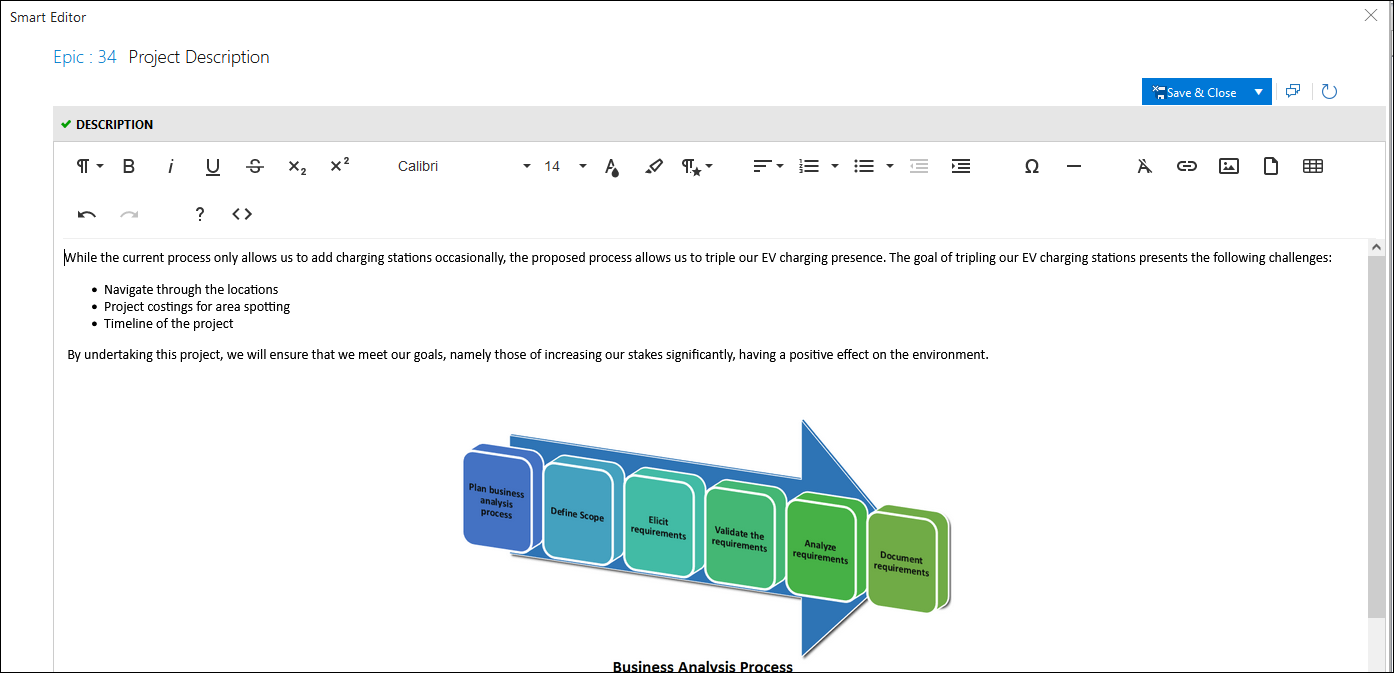
• Smart Editor is a Work Item editor with advanced rich text editing features.
• While standard Work Item editor (invoked by  Open in Web Access option) provides basic Work Item editing (11 in total) options, The Smart Editor has more advanced editing options grouped into:
• Character styling
• Paragraph styling
• Alignment
• Special formatting
• Insert (image, URL, Table etc.)
• Many of the options are available in the Smart Editor main toolbar:

|
|
Paragraph Format: used to select desired paragraph format |
|
Help: launches this help windows |
|
|
Bold: makes selected text bold |
|
Italic: makes selected text italic |
|
|
Underline: draws an underline below selected text |
|
Strike Through: makes selected text strike through |
|
|
Sub-Script: makes selected text sub-script |
|
Super-Script: makes selected text super-script |
|
|
Font-Family: used text selected desired font family |
|
Font-Size: used text selected desired font size |
|
|
Text Color: used text selected desired text color |
|
Paragraph Style: used to select desired paragraph style |
|
|
Align: used text to set the text alignment |
|
Orderd List: used to create an orderd (numbered) list |
|
|
Unorderd List: used to create a bullet list |
|
Decrease Indent: used to outdent the text |
|
|
Increase Indent: used to indent the text |
|
Insert horizontal Line: used text to add a line |
|
|
Special Characters: used to insert Special Characters in text |
|
Insert Link: used to insert URL |
|
|
Clear Formatting: used to clear current formatting |
|
Upload File: used to upload/attach a file with the Work Item |
|
|
Insert Image: insert an image in text area |
|
Undo: cancels the action |
|
|
insert Table: inserts a table in text area |
|
Redo: repeat last Action |
|
|
Code View: used to see a description in an HTML code |
|
Background Color: used to select the desired background color |
• Some options (Insert Table & Insert Image) have their own toolbars to fine-tune the result of the applied command. Their toolbars are elaborated below.
Insert Table Toolbar
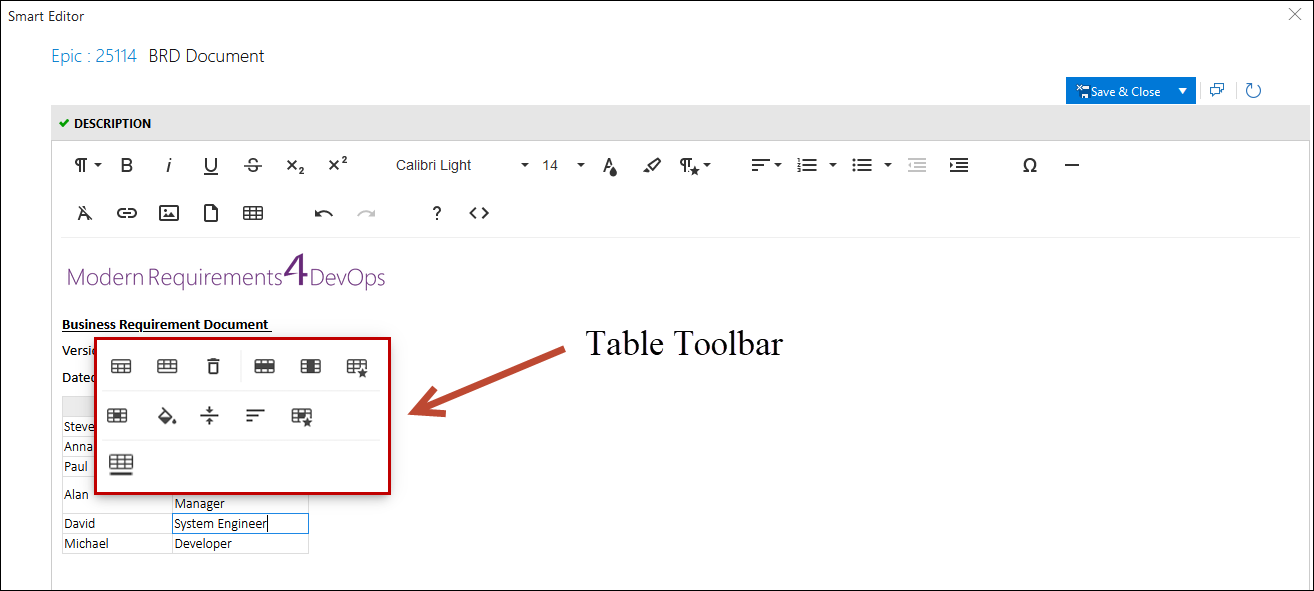
• The Table toolbar appears when clicked inside a cell, as shown in the following image:
|
|
Table Header: insert a header row in the table |
|
Table Footer: insert a table footer in the table |
|
|
Remove Table: delete the table |
|
Row (option): used to insert/delete rows |
|
|
Column (options): used to insert/deletes column |
|
Table Style: used to set the desired table style |
|
|
Cell (options): used to merge/split cells |
|
Cell Background: used to set cell's background color |
|
|
Vertical Align: used to set vertical alignment of text in the selected cell |
|
Horizontal Align: used to set horizontal alignment of text in the selected cell |
|
|
Cell Style: used to selected desired cell style |
|
Table Caption: insert a table caption for the table |
Insert Image Toolbar
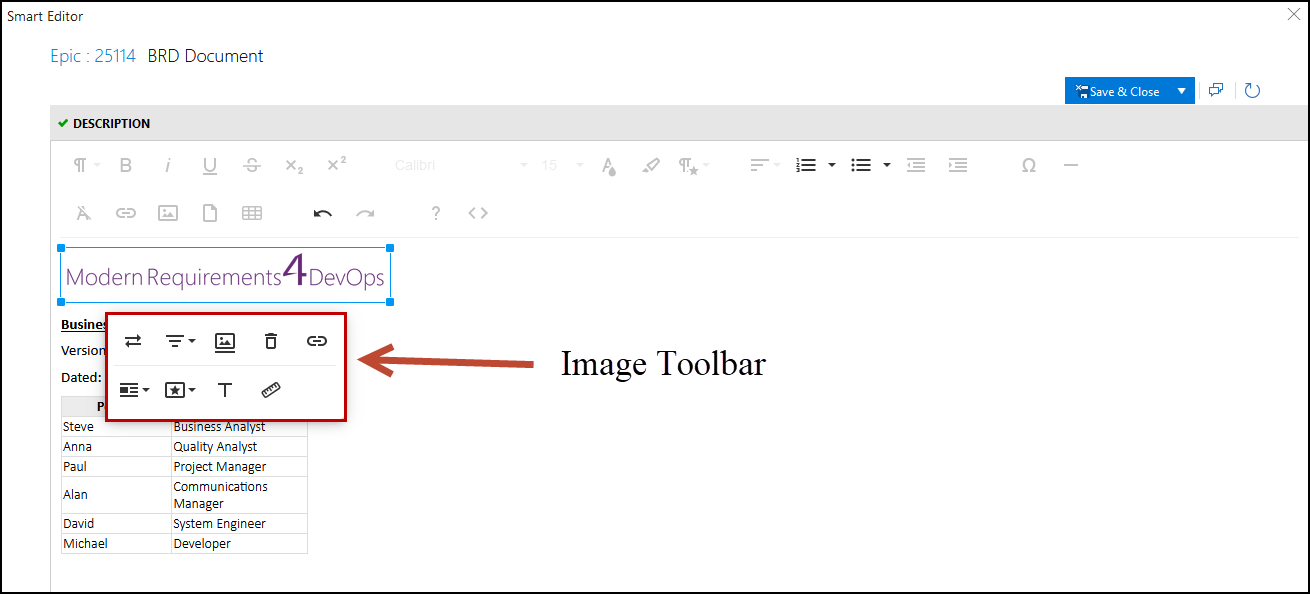
• The Image toolbar appears when an image is inserted or selected, as shown in the following image:
|
|
Replace: used to replace the selected image with another image |
|
Align: used to set alignment of the image |
|
|
Image Caption: used to set/deletes image caption |
|
Delete: used to delete image |
|
|
Insert Link: used to set URL against the image |
|
Display (text): used to set how text should be displayed in relation to the image; in-line or break text |
|
|
Style: used to set Image's style |
|
Alternative Text: used to set alternate text (in case the image is not available) |
|
|
Change Size: used to change the size of the image |
|
|
Smart Editor in Right Panel
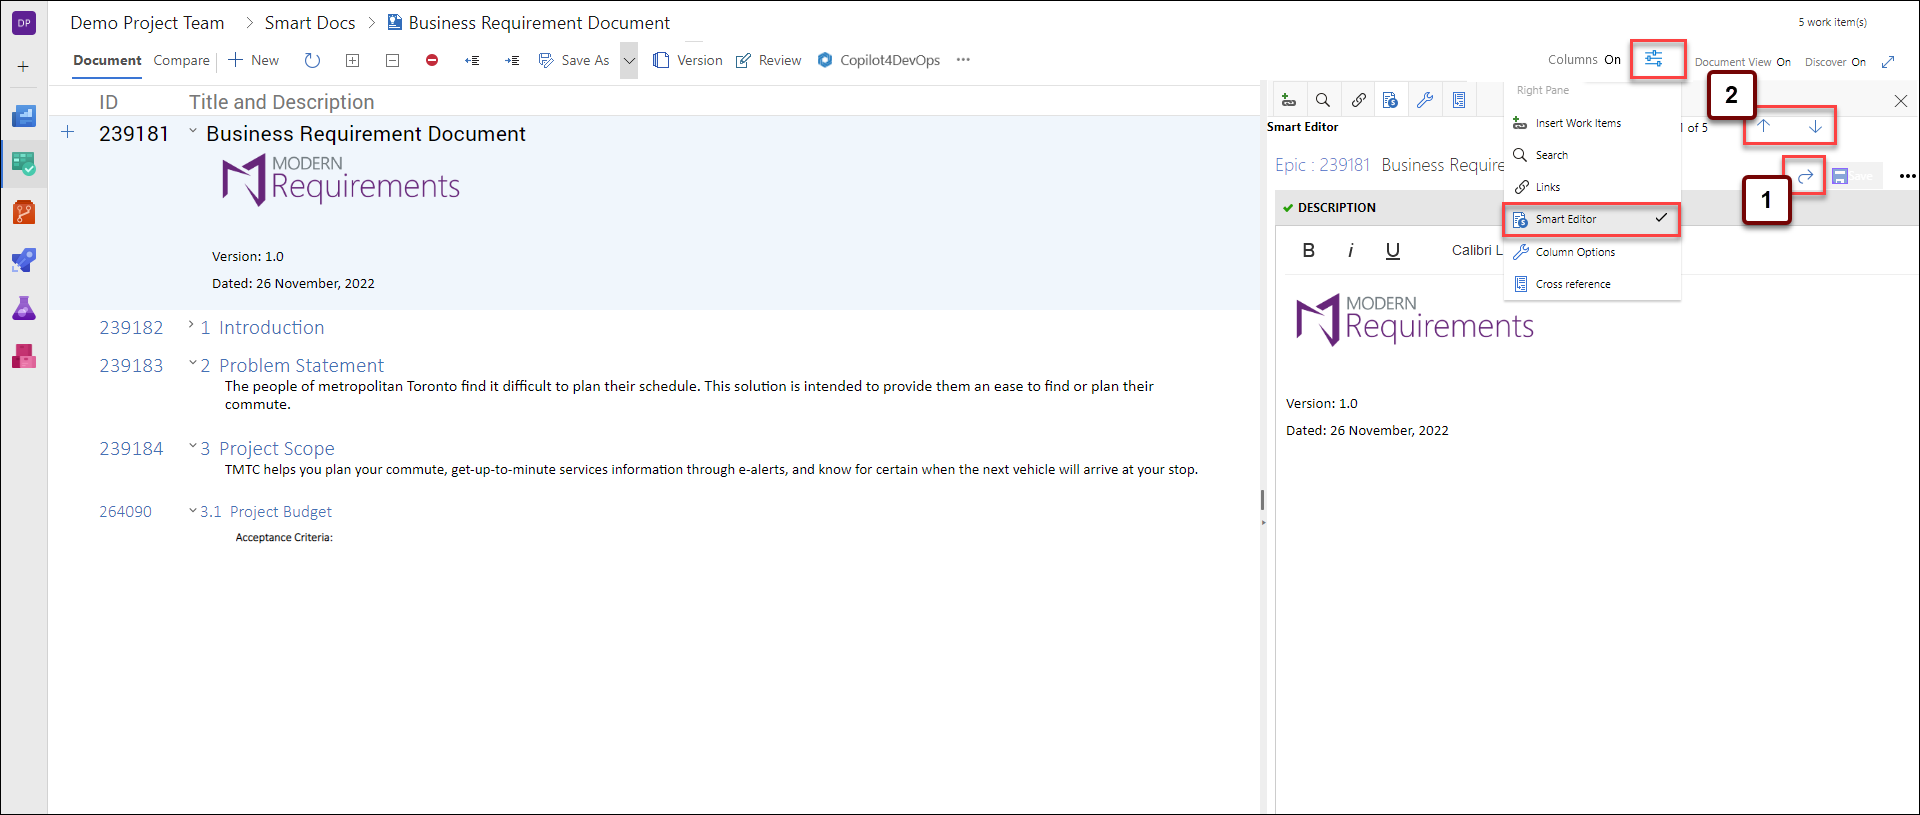
• Select Smart Editor option from the Right Panel dropdown. Edit the work item through the right panel and the changes will be reflected on the grid as well.
|
|
Open Work Item |
Open the selected Work Item in standard Work Item editor |
|
|
Up/Down Arrow |
The up and down arrows allows you to switch between the work items |


